Registering Students
Typically, students register for exam dates themselves by using the My Degree Programme application’s Curriculum Support.
Please note: In order for students to register for exam dates, the following requirements must be met:
- The exam date has been created and is activated for self-registration by students.
- The registration period is active.
Students can only register for the exam if they pass all entered exam registration checks.
Alternatively, this registration can be done at any time by the examiner. Depending on your authorisation, this is done either via Curriculum Support or directly via the Exam Management application.
Please note: When registering via Exam Management, the SPO context is missing.
The following chapters explain the various options for registering students for an exam.
Contents of this Chapter
Registering Students for an Exam Date
1. You have opened the Exam Management application.
2. Select the Exam (De)Registration module.
The List of Exams/Assessment window opens.
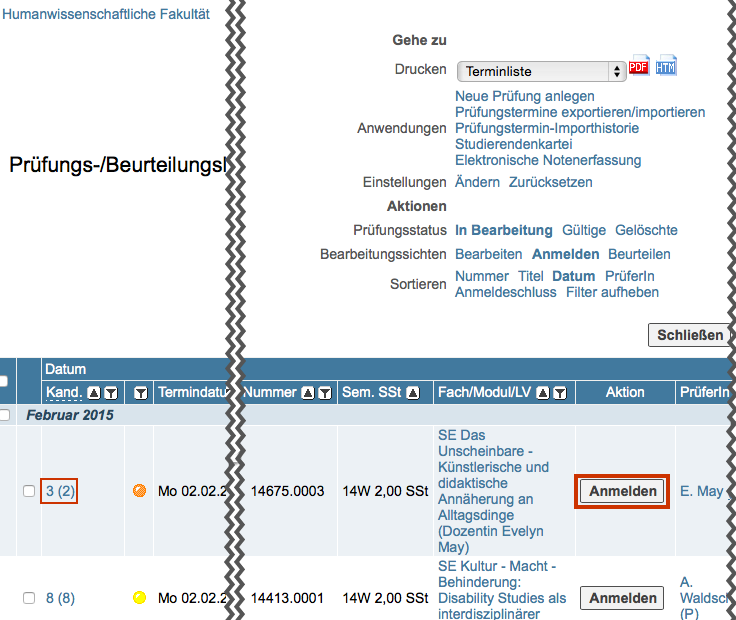
3. Click on the Register button for the exam date for which you want to register students. The Exam Registration dialog window opens.
In the Candidate column you can see how many candidates have already been registered and assessed, e.g. 3 (2) = 3 candidates registered, 2 assessed.
4. To search, enter the student's matriculation number or name and click the Search button.
If there are several results, you will receive a selection list.
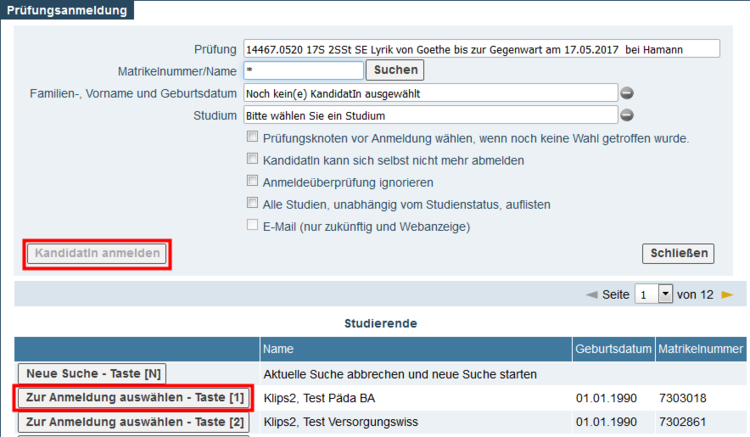
5. Click Select for Registration and then Register Candidate.
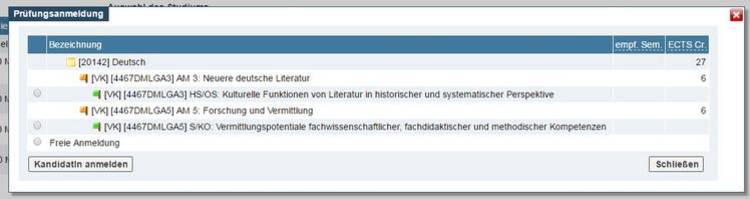
Please note: If the exams/courses for students have multiple module contexts, please use the option “Choose exam node before registration (if no selection has been made yet)”. In a further step you will be asked to confirm the module context.
Registering Students for an Exam Date via Import (CSV File)
1. You have opened the Exam Management application.
2. Select the Exam (De)Registration module.
The List of Exams/Assessment window opens.
3. Now call up the information about the desired exam date by clicking on the number in the Candidate column. The information about the exam then opens.
4. For the exam date for which you want to register students, click on the Import Candidates button in the De/Registration operation menu (top right). The Exam Registration dialog window opens.
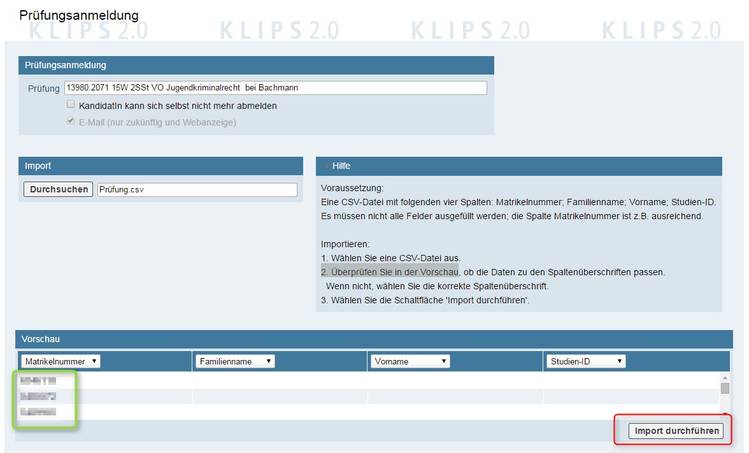
Click the Browse button and open the desired CSV file:
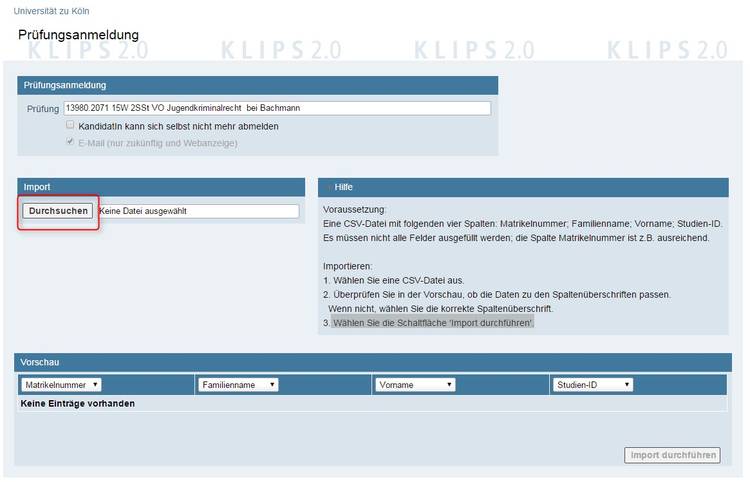
Note on Formatting:
A CSV file with the following four columns: Matriculation number, family name, first name, study ID.
Not all fields need to be filled out; the “Matriculation Number” column, for example, is sufficient.
5. Preview the data and then click Perform Import.
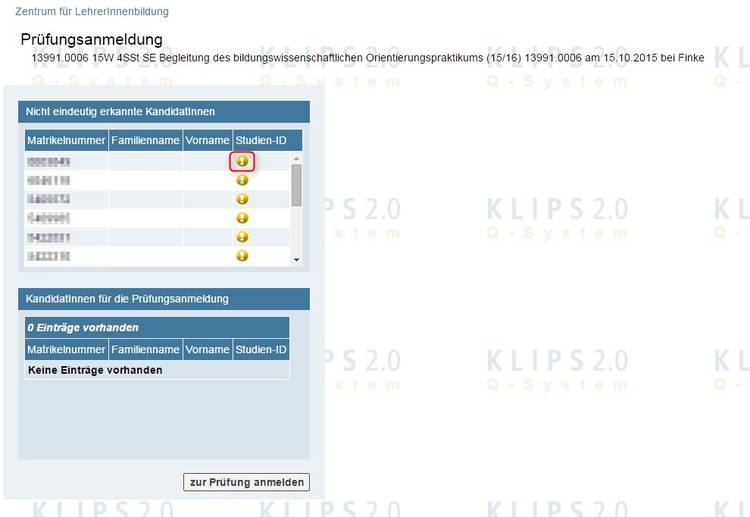
6. A new dialog window Exam Registration opens.

7. The column Study ID (= degree programme) indicates in which (partial) degree programme an exam candidate should be registered for an exam. If the Study ID column in your csv file is empty, the subject in which the exam should be registered must be specified for students with multiple subjects.
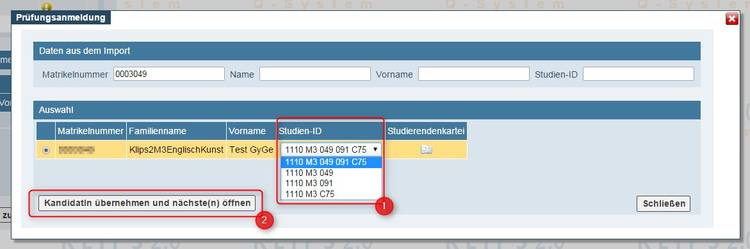
8. To do this, click on the Yellow Exclamation Mark Icon for a student, specify the desired subject or degree programme and click on Apply Candidate and Open the Next One.
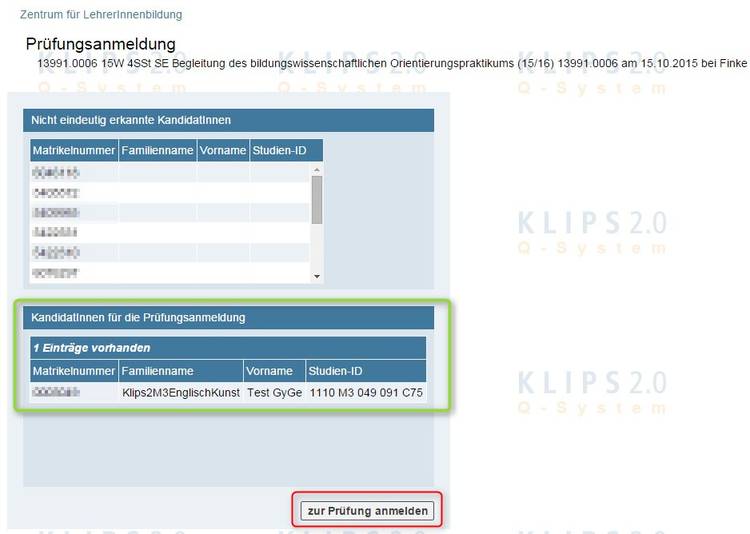
9. You can preview the candidates accepted in this way. Then click on the Register for Exam button.
Transferring Students from a Course
If the exam date has been created in the system, all or individual participants registered for a course (or course group) can be transferred into and registered for an exam for this course in one step via the List of Exams/Assessment or List of Candidates.
1. You have opened the Exam Management application.
2. Select the Exam (De)Registration module.
The List of Exams/Assessment window opens.
3. Select the exam date in which you want to transfer the participants from the course.
Another navigation area appears at the top right.
4. In the Exams row of the navigation area, click on Import Course Participants.
The Import Course Participants dialog window opens.
5. Select the groups you want to transfer to the exam date and click the Continue button.

6. All students in the groups are displayed.
Select the desired participants and click on the Register All or Register the Selected Participants button.
Please note: Under Options you can specify that this is a compulsory registration and that students cannot deregister themselves.
7. In the List of Exams/Assessment window you will now see the number of registered students in the Candidate column.
Reregistering Students
Reregistering students means deregistering the candidate from an exam and registering them for another exam (target date).
1. You have opened the Exam Management application.
2. Select the Exam (De)Registration module.
The List of Exams/Assessment window opens.
3. In the Candidate column, click on the exam date in which you want to reregister students.
The List of Candidates window opens.
4. Select the student you want to reregister.
Another navigation area appears at the top right.
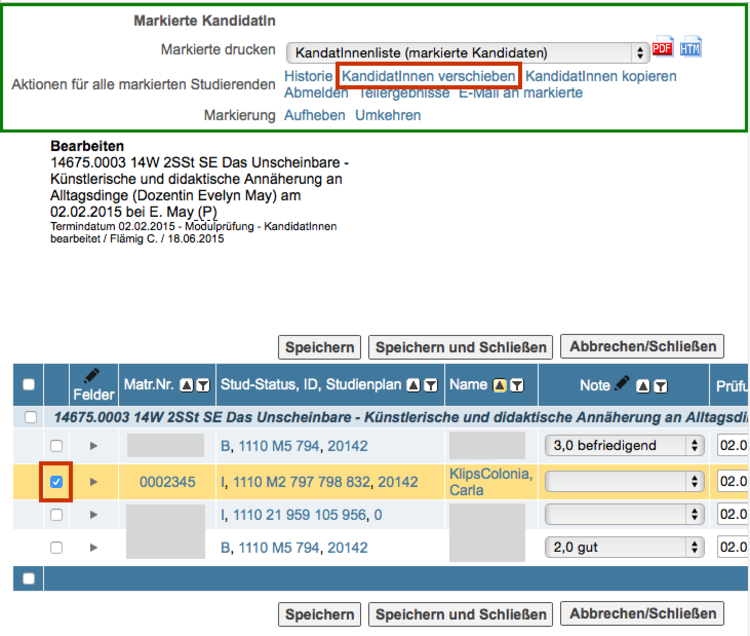
5. In the navigation area, click on Move Candidates in the row Operations for Selected Exams.
The Move Students to Another Exam: Step 1 - Select Exam dialog box opens.
6. Select the desired exam.
The Move Candidates to Another Exam: Step 2 - Check dialog box opens.
7. Click the Move button or Back if you want to correct your entry.
Copying Students to Another Exam
As an examiner or administrative staff, you can only copy candidates between your own exams.
1. You have opened the Exam Management application.
2. Select the Exam (De)Registration module.
The List of Exams/Assessment window opens.
3. In the Candidate column click on the exam date from which you want to copy students.
The List of Candidates window opens.
4. Select the student you want to move.
Another navigation area appears at the top right.
5. In the navigation area, click Copy Candidates in the Operations (for Selected Exams) row.
The Copy Students to (An)other Exam(s): Step 1 – Select Dates dialog box opens.
6. Select the desired candidates and click on the Continue button.
The Copy Students to (An)other Exam(s): Step 2 - Check dialog box opens.
7. Click the Copy button or Back if you want to correct your entry.
Registering Students Including Prerequisite Check
1. You have opened the Exam Management application.
2. Select the Exam (De)Registration module.
The List of Exams/Assessment window opens.
3. Now call up the information about the desired exam date by clicking on the number in the Candidate column. The information about the exam then opens.
Please note: In this window you can click in the "Status - Reg. Prel." column to see whether students have so far only been registered with reservations.
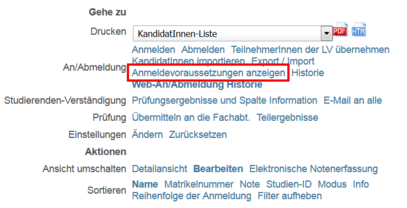
4. Click Show Registration Requirements in the navigation menu at the top right:
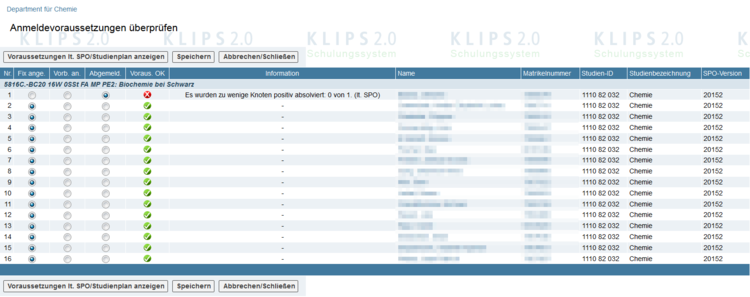
5. You will then open the Check Registration Requirements window:
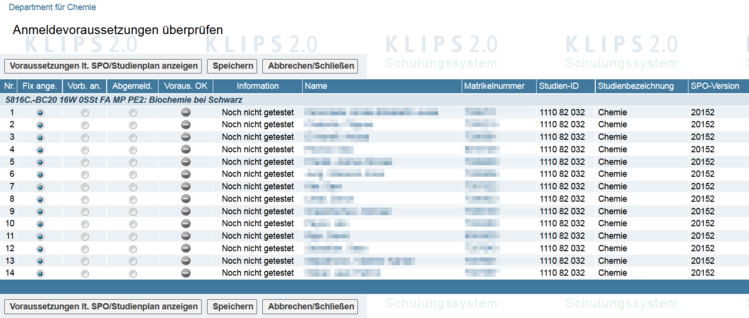
6. Please click on the Show Requirements Acc. to SPO button:
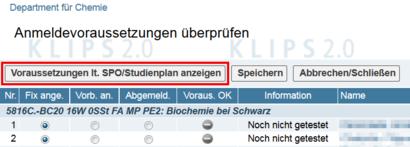
7. In the Prereq OK column the suggested information then changes: If the prerequisites check is positive, a green checkmark appears and the status is confirmed by selecting the radio button under Reg. Confirmed. If the prerequisites check is positive, the student will receive a confirmed place. If the prerequisite check is negative, the radio button for Dereg. is set.
Authorised persons can override the suggestions by clicking on the desired radio buttons.
8. By clicking the Save button, the information is saved and the registrations are carried out. Please note that the currently open window does not display the changes - it can therefore be closed after saving.