Calendar – Desktop View
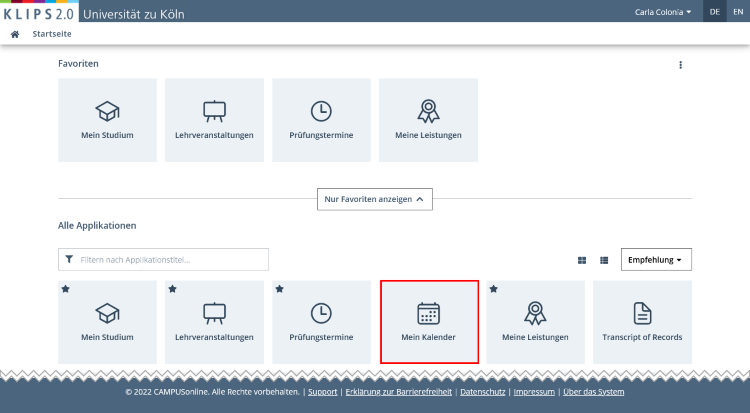
You can access the My Calendar application in the application menu on your personal Home Screen.
Contents of this Chapter
Calendar Settings
The calendar view automatically shows you the courses and exams you have registered for in the selected time period. Please note the possible setting described below. You can also create additional appointments by clicking on the New Personal Appointment button.
When opening the application, the current “Week” view is preset. You can use the Drop Down Menu to select which specific time period (day, week, month, weekday) or if your weekly schedule should be displayed. Use the Arrow Buttons to navigate e.g. to the next week or, if you selected the weekly schedule view, to the next semester. Clicking on the Calendar Icon next to the arrow buttons opens a small calendar view that allows you to jump from one month to the next or to a specific day.
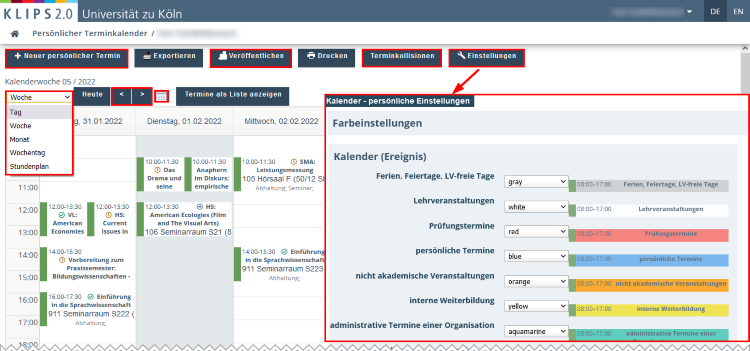
You can further adapt the view in My Calendar by clicking the Settings button. If, in addition to the courses for which you have already received confirmed places, you would like to see courses for which you are on the waiting list or for which you have entered course place requests, select Show Appointments for All Registrations under Settings > Calendar View > Participation Status (Courses, Exams, Further Education Courses). Scroll to the bottom of the settings menu and click Save and Close to confirm your settings. The calendar view updates.
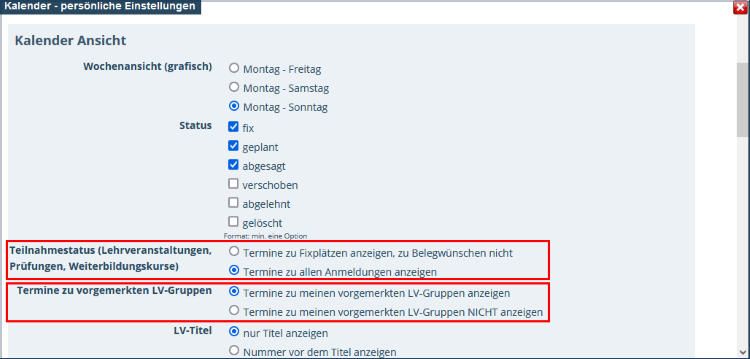
For better planning of your timetable, you also have the option of displaying bookmarked courses. This is useful, e.g., if you have not yet entered a course place request for a bookmarked course or could not yet enter one.
Select the option Show Appointments for My Bookmarked Course Groups under Settings > Calendar View > Appointments for Bookmarked Course Groups.
Please note: When this option is activated, the bookmarked courses are displayed regardless of whether you have already entered a course place request. Likewise, bookmarked courses without entered course place requests are always displayed, if you activate both the options Show Appointments for Confirmed Places Only and Show Appointments for My Bookmarked Course Groups in the calendar view settings. Please note the status icons in front of the course titles (see below).
Scroll to the bottom of the settings menu and click Save and Close to confirm your settings. The calendar view updates.
Status Displays for Courses
If you have received a Confirmed Place for a course, this course will show up in the calendar view with a Green Checkmark Icon in front of the course title.

If you remain on the Waiting List for a course or if you have entered a Course Place Request but not yet received a confirmed place, this course will show up in the calendar view with an Orange Clock Icon in front of the course title.

If registration is currently possible for a Bookmarked Course for which you have not yet entered a course place request, this course will show up in the calendar view with a Grey Arrow Icon in front of the course title.

If registration for a Bookmarked Course is not or no longer possible, No Icon will show up in front of the course title.

Show Scheduling Conflicts
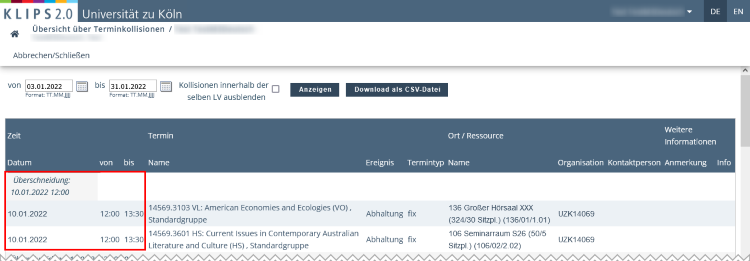
Scheduling conflicts are displayed in the calendar view. Activate Show Appointments for All Registrations and, if applicable, Show Appointments for My Bookmarked Course Groups in the calendar view settings (see above). This view is particularly useful for planning your weekly schedule and prioritising your courses.
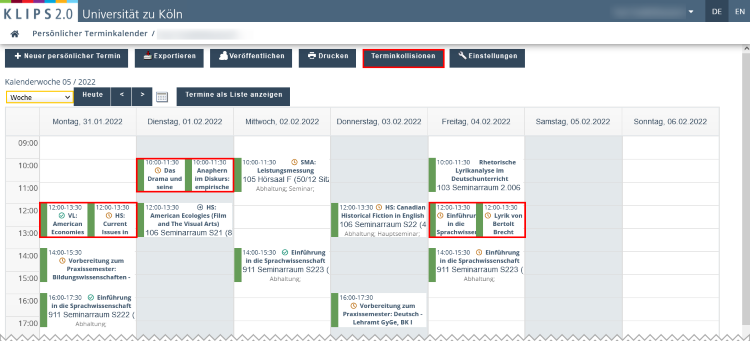
You can also use the Scheduling Conflict button to create a list of overlapping course dates during a selected time period.
Please note: When planning your timetable, be mindful that the Weekly Schedule view may not show all the courses for which you have entered a course place request. The weekly schedule is created based on dates with a weekly repetition. The weekly schedule does not show all dates of the current week but represents an approximate timetable of the entire semester. This means that the weekly schedule cannot show courses reliably, if the dates are irregular or if the dates are held in daily blocks. You can open the Settings and under Calendar View > Timetable View specify how many weekly repetitions in a series of dates must take place so that the course shows up on the weekly schedule view (minimum two repetitions). If you have registered for courses with a large number of irregular course dates or few weekly repetitions, it is advisable to use the individual Week views or the list view to identify scheduling conflicts.
Subscribe to Calendar
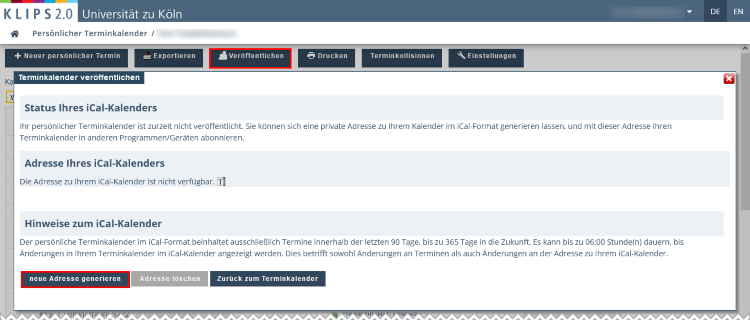
You can subscribe to your KLIPS 2.0 calendar with other programmes (e.g. Outlook, Thunderbird). By clicking on Publish you will open a pop up window. Click Generate New Address and add that address to your external iCal calendar. Please be aware that your external calendar is usually not updated immediately, but at intervals of a few hours.
Open Calendar via “Courses” Application
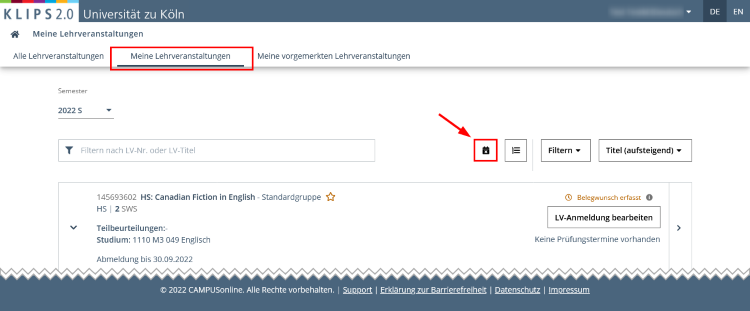
You may also open your calendar when using the Courses application. In the My Courses view, click on the Calendar Icon above the course list. To view your timetable, click on Show Course Calendar in the drop down menu that opens.
Please note: This calendar view only shows those courses for which you have entered a course place request (this includes confirmed places, course place requests, and places on the waiting list). If you have bookmarked a course but have not applied for it (yet), this course will not be shown – regardless of the settings you may have applied in the My Calendar application.