Editing Business Card – Mobile Devices
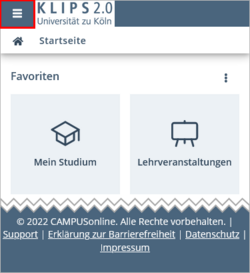
1. To edit your personal business card, tap on the Bar Menu in the top left corner next to the KLIPS 2.0 logo.
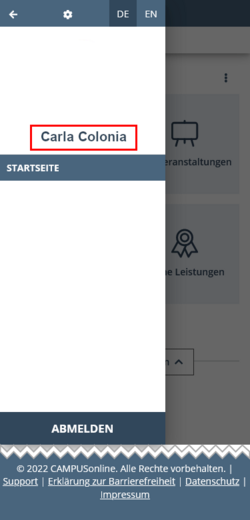
2. Tap on your User Name in the menu that opens.
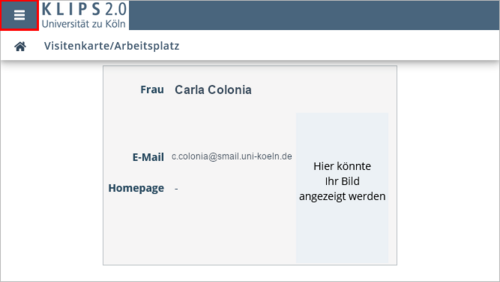
3. Your personal business card appears.
Please note: Depending on your mobile device, you may want to switch from portrait to landscape view at this point.
4. To switch to editing mode, tap on the Bar Menu to the left of the KLIPS 2.0 logo again.
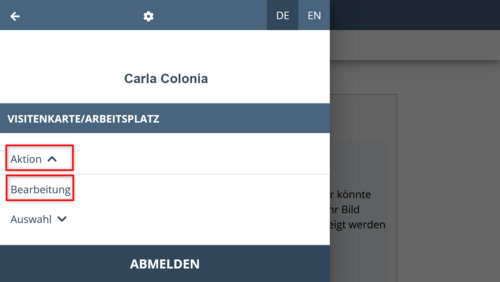
5. In the view that opens, tap to open the Operation menu and then tap on Edit.
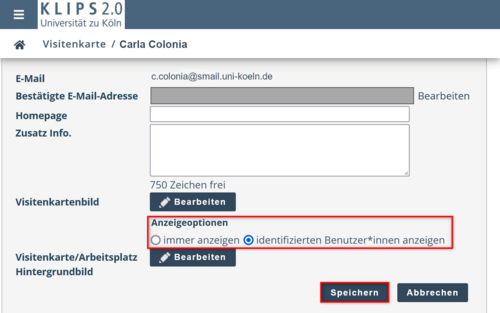
6. In the view that opens, you can now add or change some of your data. Your Smail Address (name@smail.uni-koeln.de) is linked to your user account and cannot be edited.
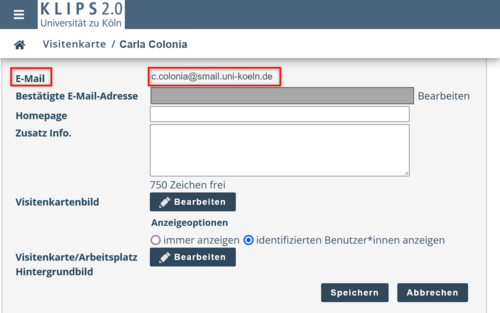
Please note: You are not obliged to add any additional information or details or to upload an image of yourself to your business card. Please be aware that your business card profile can be viewed by some members of staff (e.g. teaching staff of courses you are registered for).
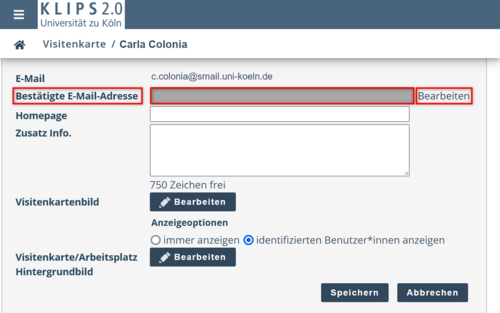
7. In the row Confirmed Email Address, you have to option of deleting or replacing a private e-mail address that you already saved during the application process or adding a new one.
Please note: Please be aware, that this e-mail address is only relevant for the Basic Account for new applicants and that KLIPS 2.0 will no longer use it for communication after your enrolment. Your basic account will be replaced by your student account after enrolment. After activation, all e-mails relating to your Student Account will only be sent to your smail-address.
To do this, tap on Edit.
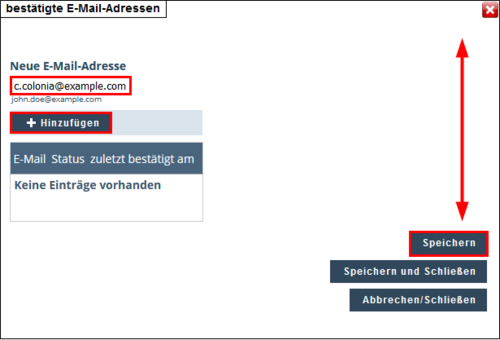
8. A pop up appears. Below New Email Address, enter the e-mail address that you wish to save. Tap on Add. The e-mail address now shows up in the table below.
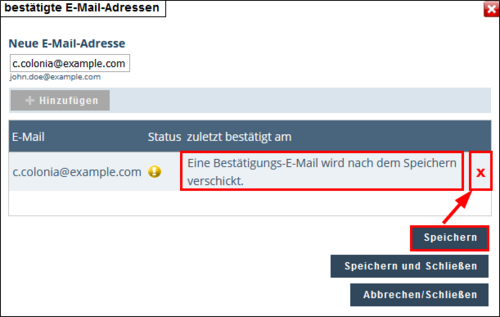
9. To save the new confirmed e-mail address, tap on Save.
10. The pop up updates once more. In order to finalise the confirmation of the new e-mail address, tap on the link in the confirmation e-mail that was sent to the new e-mail address and follow the instructions.
11. Tap on the Red Cross if you intend to delete the new e-mail address. This is only possible if you did not confirm the e-mail address yet. Tap on Save to confirm the deletion.
12. If you want to replace an already confirmed e-mail address, repeat the steps 5 through 7. The old e-mail address will be replaced once you confirmed the new one via the link in the confirmation e-mail.
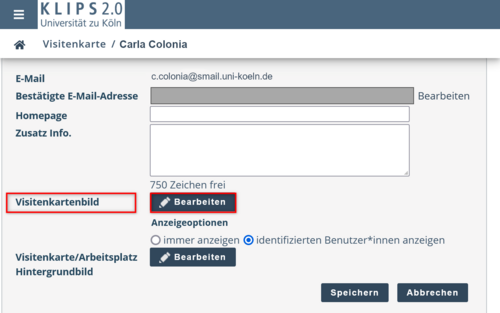
13. To upload an image to your business card, please tap on Edit in the row Business Card Picture.
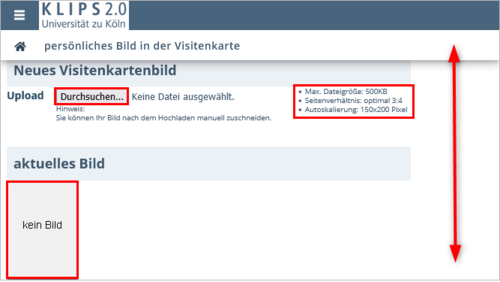
14. The upload page opens. Tap on Durchsuchen (“Browse …”) or Datei auswählen („Choose File“) in certain browsers to upload a photo from your photo library. Take note of the given specifications for the photo (max. file size 500 KB, optimal aspect ratio 3:4, autoscaling 150:200 pixels).
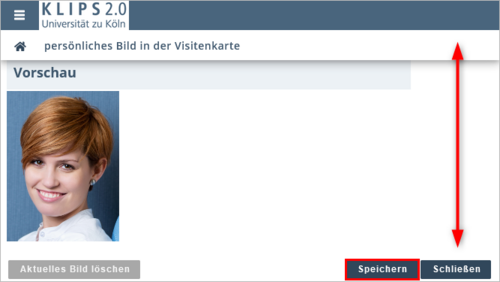
15. The selected photo appears on the left side of the screen. Tap on Save.
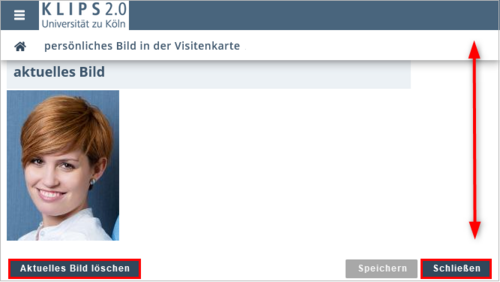
16. If the photo was uploaded successfully, a corresponding message appears to confirm.
17. If you decide not to use the uploaded image, please tap on Delete Current Picture. Otherwise, tap on Close to return to the editing form.
18. Under Display Options you can now decide whether the image can also be seen by anonymous users (always) or only by logged in users (Only to Authenticated Users). Tap Save to confirm your settings.
19. Your personal business card updates. It now shows your photo on the right side.