Managing Favourites – Desktop View
In the default view, you will not yet see any Applications in the “Favourites” area of the Home Screen.
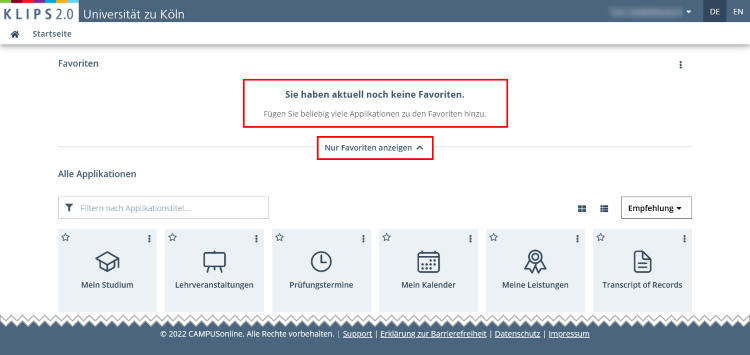
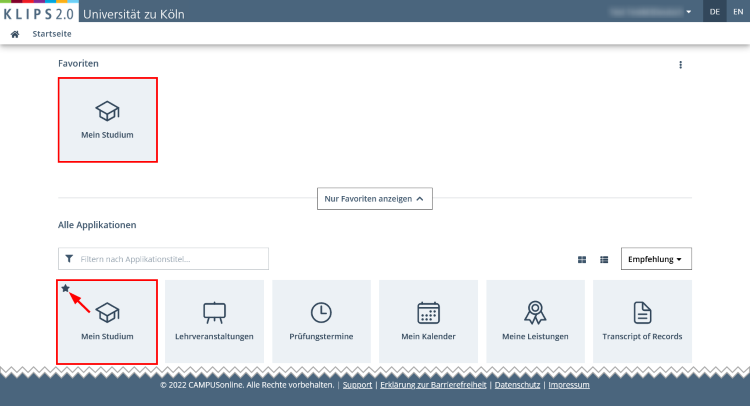
You have the option to customise and condense your Home Screen view so that you only see the favourites you have selected. To do this, click on the Show Only Favourites button, which separates the "Favourites" and "All Applications" areas (see last screenshot). The view updates and only your favourites are displayed.
To undo this, click the Show All Applications button.

The view updates once more and both areas are displayed again.
Contents of this Chapter
Add Favourites
To mark an application as a favourite, proceed as follows:
1. Find the desired application (e.g. My Degree Programme) in the Application Menu.
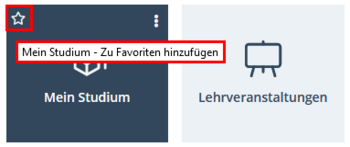
2. If you move the mouse over the application, the colour changes from light blue to dark blue. Click the Star Icon in the top left corner of the application button.
3. The view updates and the application appears in your “Favourites” menu.
4. Alternatively, you can also click the More Options Button in the right corner of the tile. A context menu Add to Favourites appears.
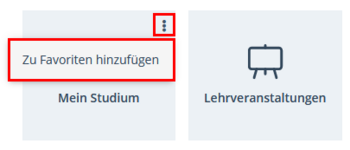
5. If you click on the button, the application will also appear in your “Favourites” menu.
Remove Favourites
1. To remove an application from your “Favourites” menu, click the Star Icon again. It makes no difference whether you select the application button in the “Favourites” menu or in the application menu. Both lead to the same result.
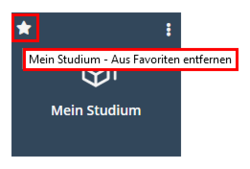
2. Alternatively, you can also click on the More Options Button in the right corner of the tile: a context menu opens with the options Remove from Favourites and Move to Folder.
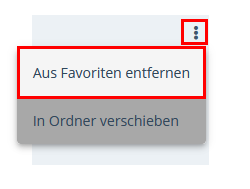
3. Click Remove from Favourites: The application is no longer displayed in the “Favourites” menu.
Please note: This function is only available in the “Favourites” menu. In the application menu, the more options button only opens the Add to Favourites context menu, which is disabled at this point.
Add Favourites to Folders
KLIPS 2.0 also offers you the option to group your favourites into folders (e.g. by topic). To do this, proceed as follows:
1. In the “Favourites” menu, click the More Options Button on the very right.
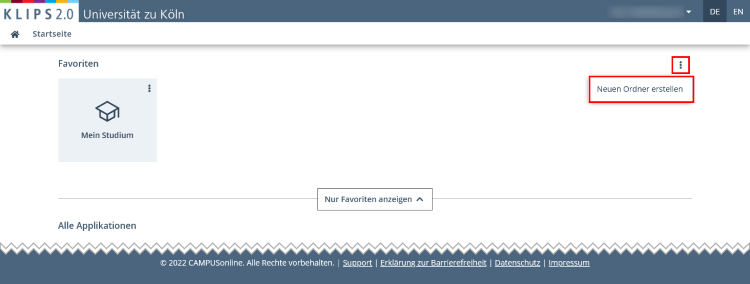
2. A context menu opens: The button Create New Folder appears. Click the button.
3. A pop up will appear asking you to name the new folder. Enter a folder name, e.g. "Exams", and click on Save.
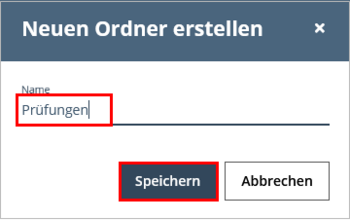
4. The view updates and the folder now appears in your “Favourites” menu.
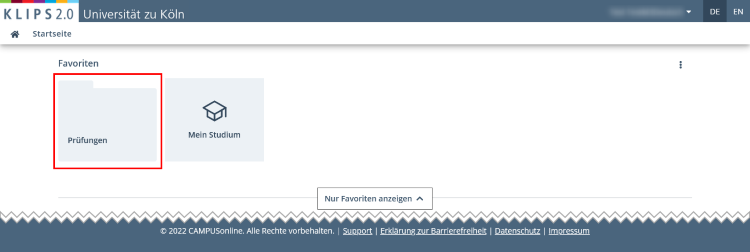
5. To add an application to the folder, the desired application must already have been added to the “Favourites” menu. Click the More Options Button in the right corner of the tile. A context menu appears with the menu items Remove from Favourites and Move to Folder.
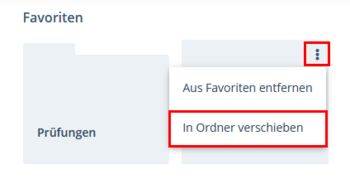
6. Click on Move to Folder.
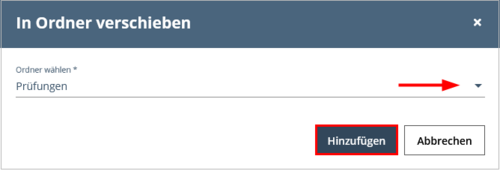
7. A pop up will appear asking you to select the folder to which you want to move the application. Open the drop down menu and select the desired folder: in this case "Exams". Click Add to confirm your choice.
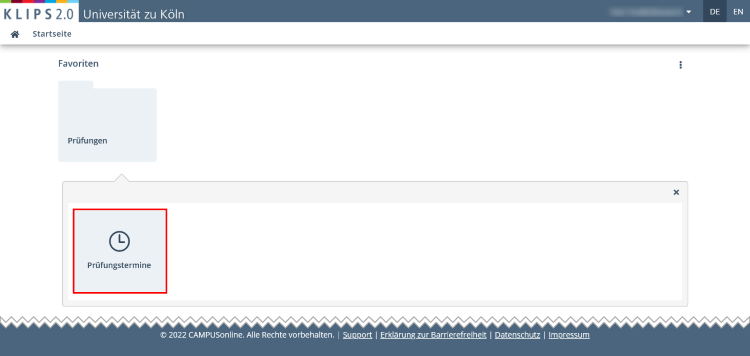
8. The view updates. If you now click on the "Exams" folder icon, a menu with the added applications will appear underneath. Click on the desired application to open it.
Remove Folders
1. To remove a folder, click on the More Options Button in the right corner of the respective folder icon and select the corresponding Remove item in the context menu.
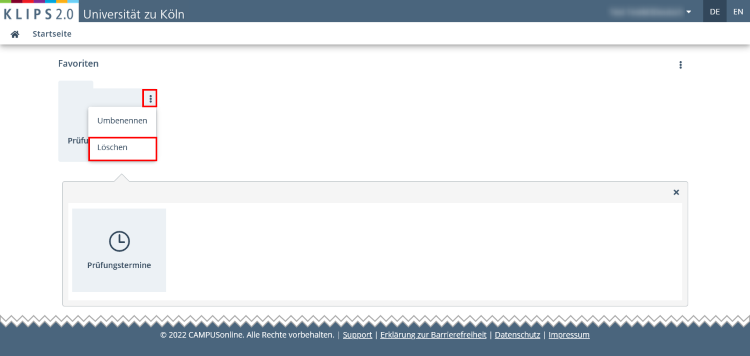
2. Remove causes both the folder and the favourites it contains to be deleted. Click Yes to confirm deletion.
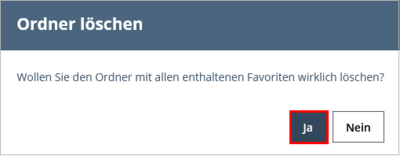
3. The view updates: To add an application to the “Favourites” menu again, select the application in the application menu and mark it as a favourite again.
Rename Folders
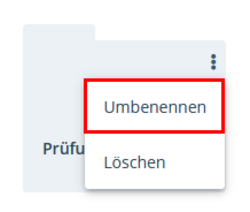
1. To rename a folder, click on the More Options Button in the right corner of the respective folder icon and select the corresponding Rename item in the context menu.
2. Enter the new folder name and confirm your changes by clicking Save.
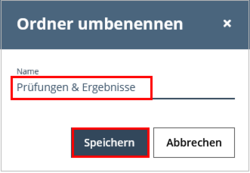
3. The view updates.