UCCard Image Upload
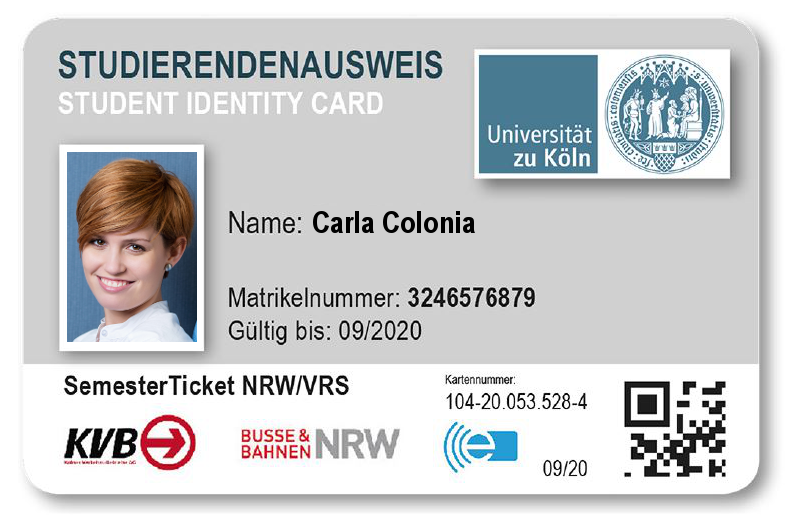
The UCCard is the student card of the University of Cologne. More detailed information can be found at https://uccard.uni-koeln.de/index_eng.html. For identification, the UCCard has a photo, which can be uploaded in KLIPS 2.0.
For further questions, please contact the UCCard-Support, which can be found here:
Studierenden Service Center (SSC)
Building 102
basement, Room -1.120 (follow signs)
Universitätsstraße 22a
50937 Köln
email: uccardverw.uni-koeln.de
In case of queries please always provide your student-ID (Matrikelnummer) or applicant number as we can read your data only on the basis of student-ID.
Uploading a New Photo
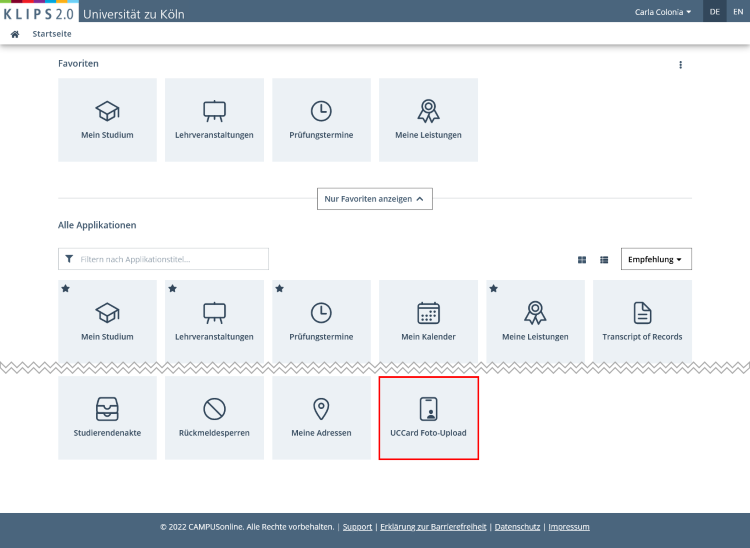
1. To upload a photo for the UCCard, open the application UCCard Image Upload in the application menu of your personal Home Screen.
Please note: We recommend using a desktop computer for uploading a photo for your UCCard because the UCCard Image Upload application has not yet been optimised for mobile devices. Should you use a mobile device, the instructions for the desktop view below correspond to the steps on mobile devices.
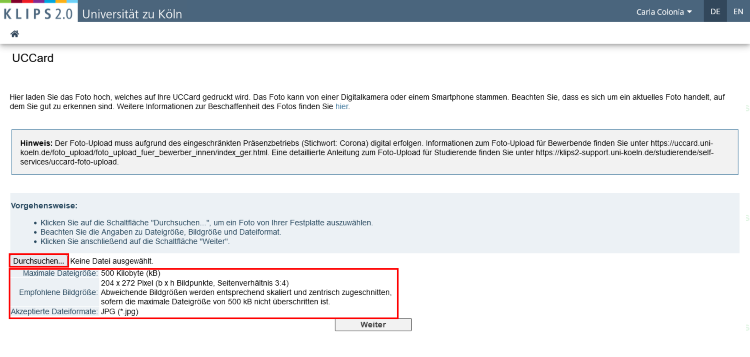
2. The page UCCard opens. Click on Durchsuchen (“Browse...”) or Datei auswählen (“Choose File”) in certain browsers to select a photo from your photo library.
Please note: Make sure to check the information about the file size, image size and the file format. If your photo was taken with a smartphone, please take care that you use a low camera resolution (0.5 megapixels is enough). Most smartphones exceed this resolution, so ensure that your photo does not surpass the maximum file size of 500 kB.
Please note: Due to the fact that the UCCard not only serves as a travel ticket but also as an exam identification in some faculties, it is important that the picture you choose is not only a current photo but also one in which you can be identified.
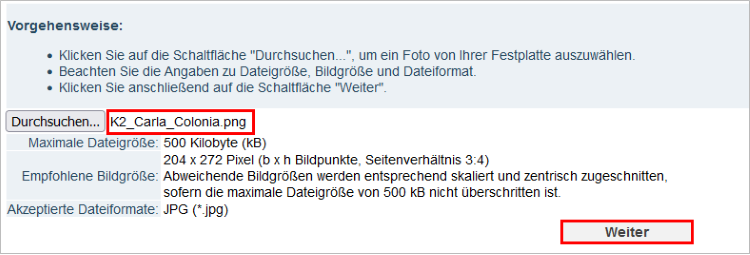
3. The file name will be displayed after the selection. Please click Continue.
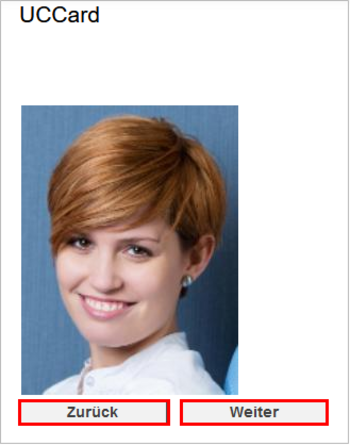
4. The uploaded photo will be displayed. KLIPS 2.0 automatically scales and centers deviating image sizes (width x height in pixels). Please make sure that your photo is depicted properly in this step.
- If your image is not depicted properly, please click on Back and upload another photo. Please note the information provided by the UCCard-Support.
- If your image is depicted properly, please click on Continue.
5. To confirm your final choice, click on Continue once again.
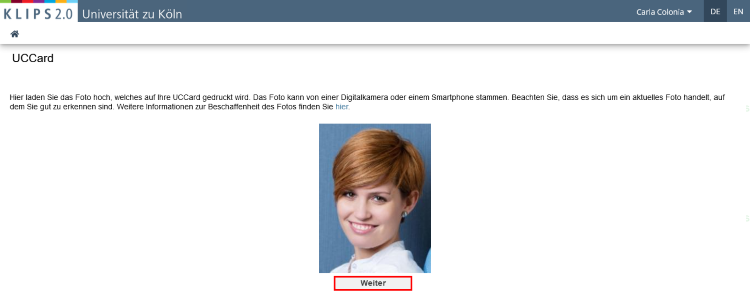
6. Your photo for the UCCard is now saved. You will be notified via e-mail as soon as your UCCard is ready to be sent to you. To finish, click on Back. You will be redirected to the upload page. Click on the House Icon in the top left corner to return to your personal Home Screen.
Please note: Do not worry if your uploaded photo does not appear on your personal business card. The photos for the UCCard and the personal business card are not identical. The photo that you upload in this application is used exclusively for the UCCard. You can find out how to upload a photo for your personal business card here.
Exchanging an Existing Photo
1. Please perform the steps 1-4 in the above instructions "Uploading a New Photo”.
2. Now, both photos will be placed side by side.
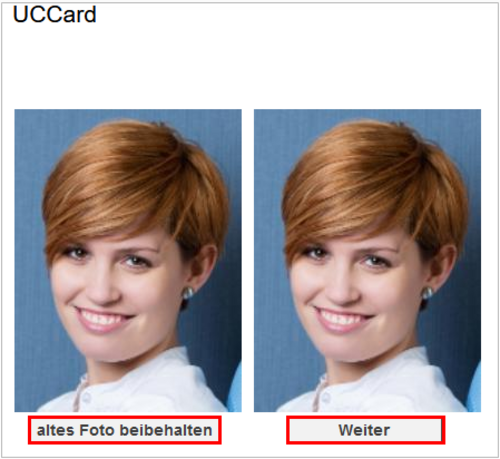
3. Choose one of the following options:
- If you want to replace the old photo (on the left) with the new photo (on the right), click on the button Continue. Subsequently, follow the steps 5 and 6 in the instructions above.
- If you want to keep the old photo (on the left), please click on the button altes Foto beibehalten ("Keep Old Picture"). You will be redirected to the upload page. Click on the House Icon in the top left corner to return to your personal Home Screen.
Please note: The photo that is uploaded for your UCCard will be deleted 6 weeks after the upload, provided the card has been produced by then.