Change Confirmed E-Mail Address (Basic Account) – Mobile Devices
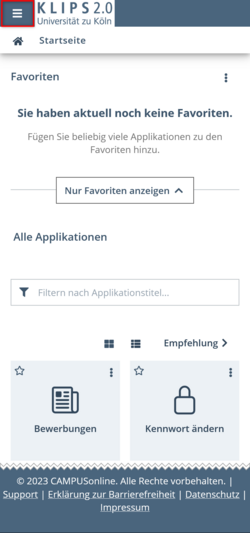
1. Log in to KLIPS 2.0 with your user data. You open your personal Home Screen.
2. Tap the Bar Menu button at the top left next to the KLIPS 2.0 logo.
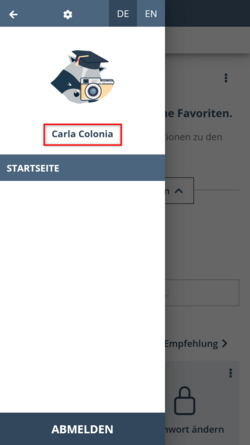
3. Now tap on your Username on the page that opens.
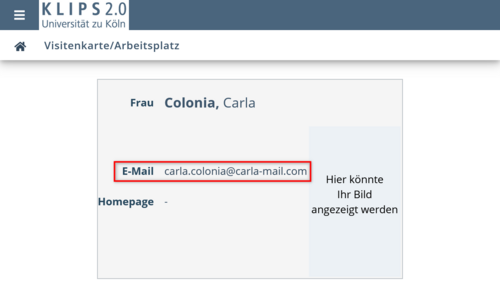
4. Your personal Business Card is displayed. To open the edit mode, tap the Bar Menu button at the top left next to the KLIPS 2.0 logo again.
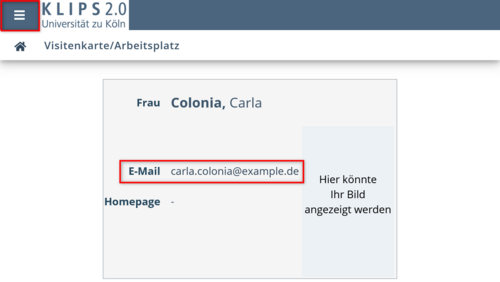
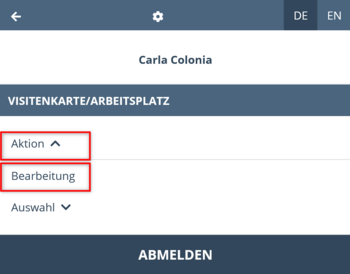
5. The operations menu opens. Tap the Operation button and then tap the Edit button in the menu that opens underneath.
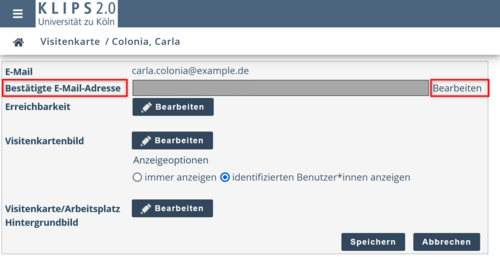
6. The editing form of the personal business card appears. The email address currently in use is displayed at the top. In the Confirmed Email Address row, tap the Edit link on the far right. Depending on your mobile device, it may be advisable to switch from portrait to landscape format for a better overview.
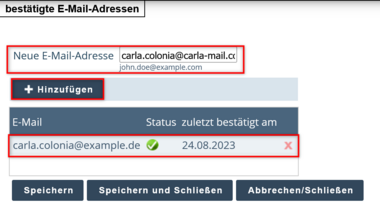
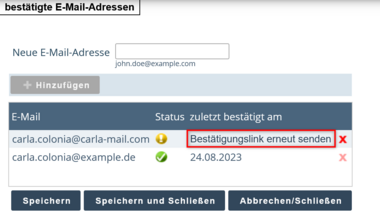
7. In the Confirmed Email Addresses window that opens, the current, confirmed email address is displayed in a table. The confirmed status is indicated by a green tick. At this point, the red cross on the far right for deleting the email address is inactive, since a confirmed email address must be available at all times.
8. At the top, in the New Email Address row, enter your new email address, then tap the Add button.
9. The view of the window is updated. The unconfirmed email address is now also displayed in the table. It is marked by a yellow exclamation mark. Check that the address has been entered correctly. If it isn't, delete it by tapping the Active, Red Cross on the far right of the table and re-enter it.
10. If the email address is correct, tap the Save button.
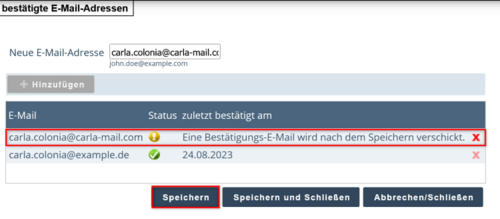
11. The view of the window is updated again. A confirmation email will be sent to the entered email. If you didn't receive a confirmation email, tap the Resend Confirmation Link link to request a new link.
If you entered the email address incorrectly, you can delete the email again as described above, re-enter it and save it.
12. Open your email inbox and tap on the Confirmation Link in the received email to complete the activation of the new email address.
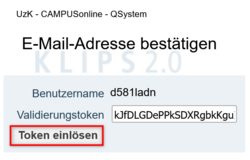
13. You will now be redirected and asked to confirm your email address by redeeming the validation token provided. To do this, tap on the Token einlösen (“Redeem token”) button.
14. A system notification that validation was successful appears at the top of the page.

15. Now return to your personal business card as described above. Your new email address will be displayed. The old email address has been deleted.
