Recording Grades via Import/Export
1. You have opened the Exam Management application.
2. Select the Assessing Exams module.
The List of Exams/Assessment window opens.
In the Candidate column you can see how many candidates have already been registered and assessed, e.g. 1 (0) = 1 candidate registered, no assessment.
3. In the Candidate column, click on the exam date from which you want to assess students.
The List of Candidates window opens.
4. To record grades via export/import of a csv file, click on Export/Import in the De/Registration row of the navigation area.
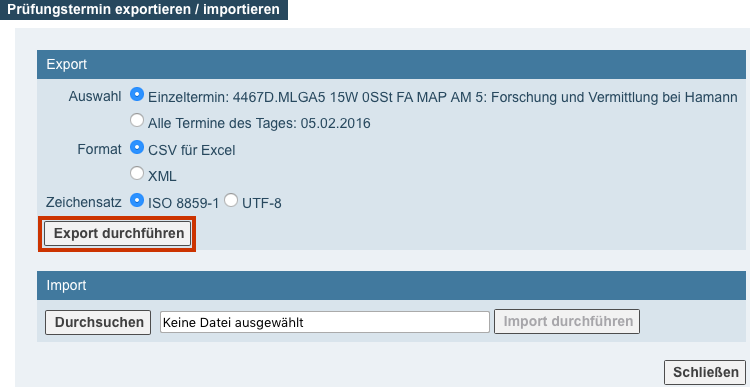
The Import/Export of Exam Date window opens.

5. If necessary, select other export options and click the Perform Export button to download a CSV file for Excel.
The download opens in a separate window.
6. Open the csv file on your computer.
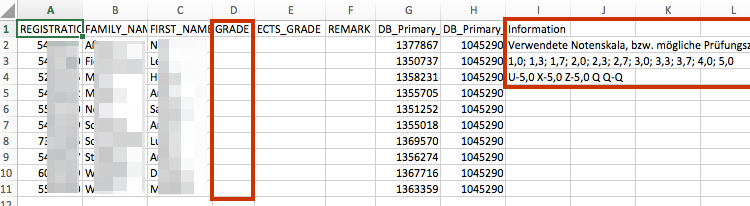
The exported CSV file contains columns with information about the candidates and the assessment.
Enter the grade in the GRADE column and save the file.
Please note: You will receive a list of possible assessments in the "Information" column (far right) of the exported file. Only the columns for the grade (column name "GRADE") and for additional information (column name "REMARK") should be filled in the file.
Assessments with grade additions such as “U (Void/Fraud)” are also entered in the “GRADE” column. The grade additons “Q (Withdrawn for Approved Reasons), U (Void/Fraud), X (Did Not Attend), Z (Rejection)” can therefore be recorded with an entry in the “GRADE” column. Only the letter "X", "Q" etc. should be entered.
After the import, the complete grade will be displayed in the list of candidates.
7. To import the csv file, click the Browse button in the Import/Export of Exam Date window.
Select the appropriate file on your computer and confirm your selection using the Next > Content Check button.

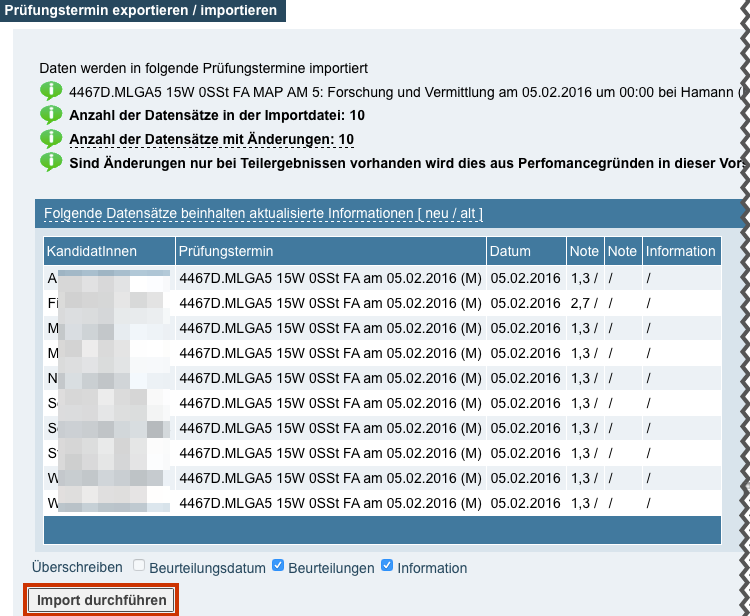
8. The adjusted data of your import is displayed in a preview window. You can check the changed or added data.
If corrections are necessary, close the window, edit the CSV file and import it again.
After successfully checking the preview, confirm the import using the Perform Import button.
9. The preview window closes and the imported data can be seen in the List of Candidates window.
Complete the operation by clicking the Save and Close button.