After the Assessment
Please note: After you complete the assessment, students' grades may be published as preliminary results.
Under Exam Results and Information Column in the "Student Notification" row of the navigation area, you can specify whether exam and partial results as well as the Information column are published provisionally.
Please adhere to the guidelines of your faculty.
Please note: Provisionally published exam results have no immediate effect on the progress of your students' studies, i.e. all credit points and any module or subject grades are not yet displayed to students.
The next step after the assessment is to print out the Examination Protocol and send it to the responsible department for Validation.
Please note: Only examination protocols for past exam dates can be printed.
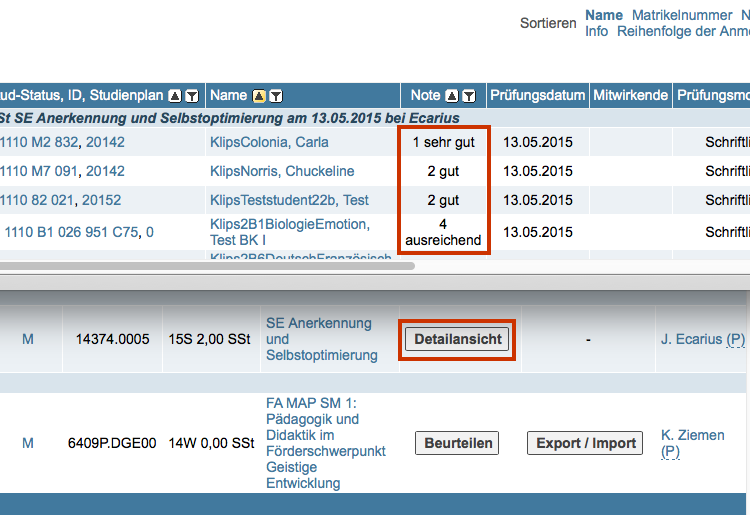
1. You have opened the List of Candidates window of the exam for which you want to print the examination protocol.
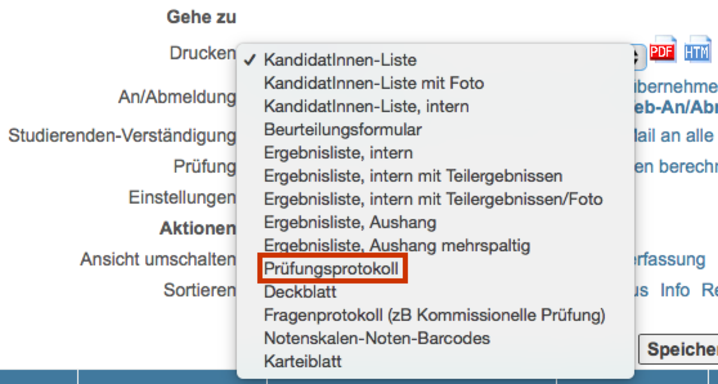
2. In the Print row of the navigation area, select the Examination Protocol from the drop down menu and click on the PDF icon ![]() .
.
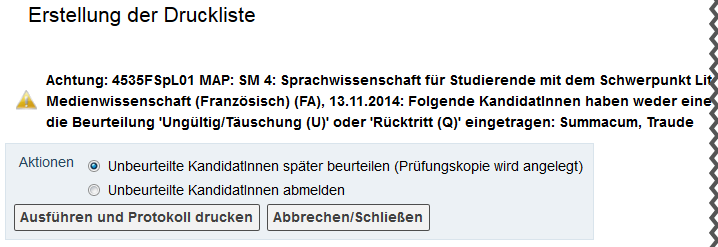
Please note: If at least one candidate for an exam date has a grade of "X – Did Not Attend" or has not been assessed, this will be indicated when the examination protocol is printed. You now have two options. Either you select the option “Move Assessed students to a Copy of the Exam and Print Examination Protocol” or you deregister the candidate.
Important: If you choose the first option, unassessed candidates will be moved to a copy of the original date (a new exam date entry in the date list will be created automatically).
3. The examination protocol is created and opens in a separate window. Save the PDF → print it out → sign it and send the examination protocol to the responsible department (e.g. examination office).
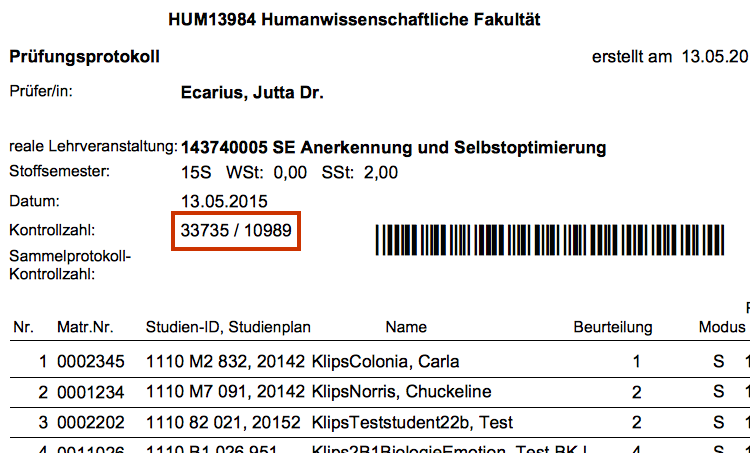
Please note: The last four digits of the control number on the examination protocol are necessary for later validation of exams.
4. After the examination protocol has been printed, select Forward to Resp. Dep. in the Examination row of the navigation area and confirm via the Continue button in the Forward Exams dialog box and in the following window via Quit.
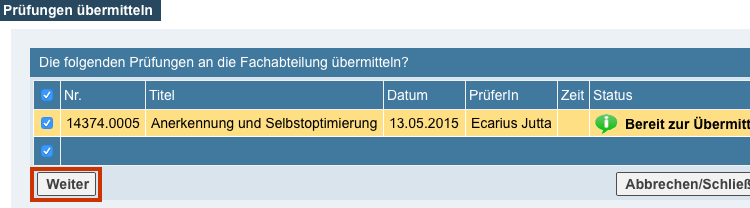
Please note: You can select several exam dates by marking the desired exam dates at the beginning of the row, and then printing a summarised exam protocol for them and sending the combined exams to the responsible department to validate.
5. In the List of Exams/Assessment window you will see that the circle in the corresponding row is now green. This indicates that the exam results have been forwarded to the responsible department.
6. You can now view the results in the Detail View of the exams, but you can no longer make any changes.
7. If a candidate does not show up for an exam, the grade X - Did Not Attend – 5,0 Fail will be entered.
However, if the student submits a valid medical certificate for the period of the examination, the grade X will later be replaced by the grade Q – Withdrawn for Approved Reasons - Q No Grade. (The certificates are processed by authorised persons.)