Sending Emails to Participants
If you would like to send an email to students on the confirmed place or course place request list of your courses, proceed as follows:
1. Log in to KLIPS 2.0 with your user data: https://klips2.uni-koeln.de
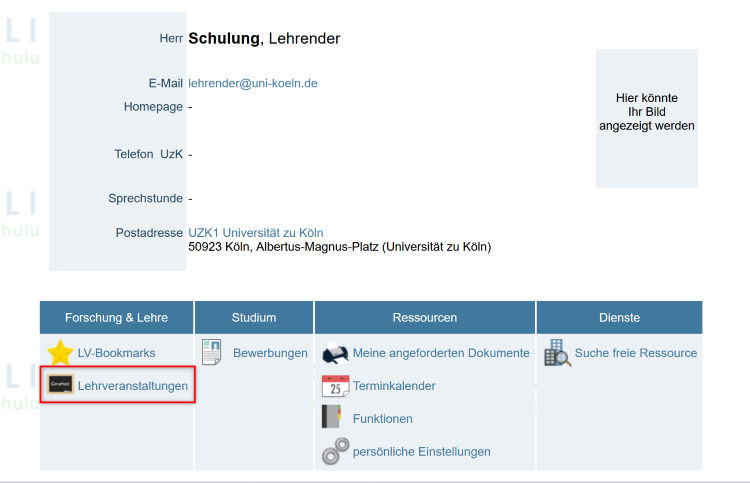
2. Your Personal Business Card opens. Click on the Courses application to open it.
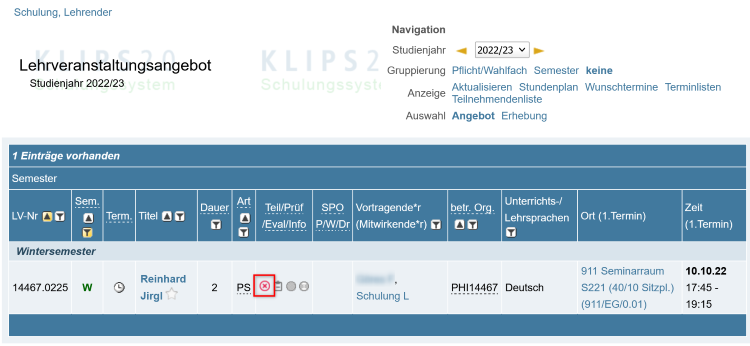
3. Your Courses Offered page opens. The list of courses you offer will be displayed in a table. Click on the Red Cross ![]() or, if the registration period is still active, the Green Arrow
or, if the registration period is still active, the Green Arrow ![]() in the Part/Exams/Eval/Info column.
in the Part/Exams/Eval/Info column.
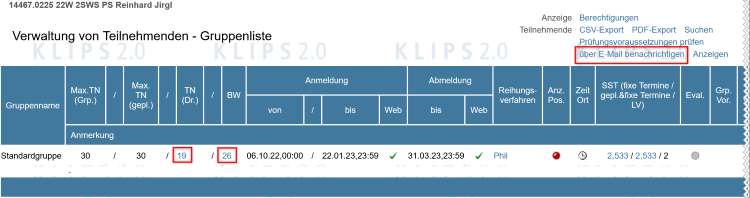
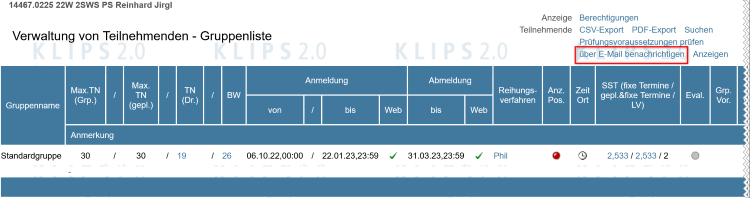
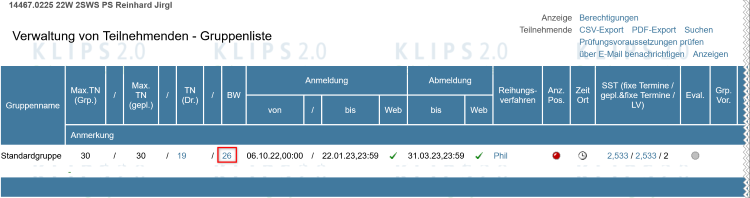
4. The Participants Administration - Group List page opens. Depending on the group of people you want to write to, you have different options for accessing the email function.
Email Options
Email to All Students (Confirmed Place List, Course Place Request List or Both)
1. If you would like to send an email to all students on the confirmed place and/or course place request list of your course, click on the link Notify by Email under Participants in the navigation menu on the right.
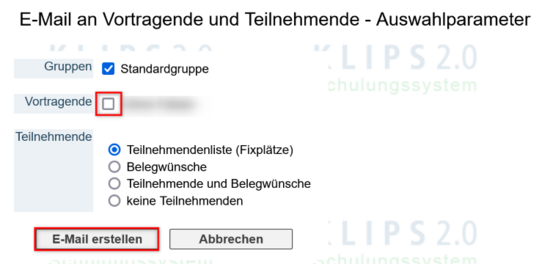
2. The Email to Lecturers and Participants - Selection Parameters window opens. Several selection parameters are available to you:
| Parameter | Description |
|---|---|
| Groups | If there is only one standard group (“Standardgruppe”), the standard group is already preselected under “Groups”. Otherwise, activate the check mark for the desired group(s). |
| Lecturers | Activate the check mark next to the desired lecturers to include them in the email list. |
| Participants | List of Participants (Confirmed Places): All students who are currently on the list of participants (confirmed places) will be contacted. Course Place Requests: All students who are currently on the course place request list will be contacted. Participants and Place Requests: All students who are currently on the list of participants (confirmed places) or course place request list will be contacted. No Participants: No students will be contacted, only the lecturers selected in the “Lecturers” parameter.
|
Activate the desired parameters and click the Write Email button.
3. The Send Email window opens. Complete the email form that appears.
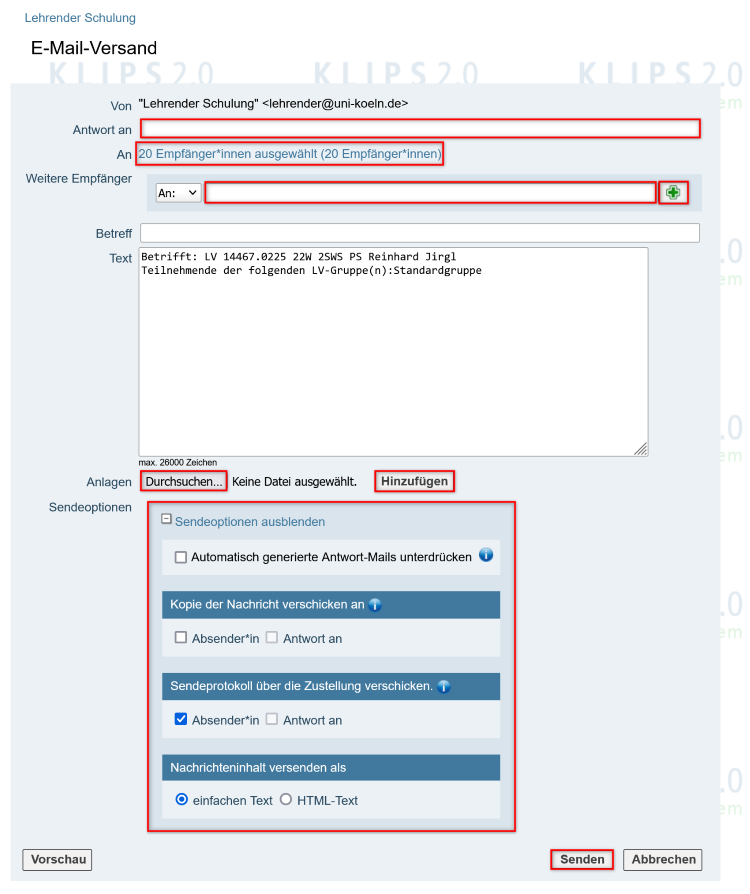
You can enter an alternative reply address in the Reply to row. If you leave the field blank, you will receive replies via the email address saved in your Personal Business Card. This should be the norm.
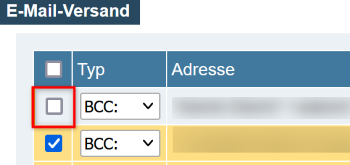
In the “To” row you can display the list of email recipients by clicking on the link (in this case “20 recipients selected (20 recipients)). By default, “Bcc (blind copy)” is selected as the delivery form. If necessary, you could also remove individual students from the email list by deactivating the blue Check Box in front of the email address.
In the Further Recipients row you can add additional email addresses if necessary. Enter an email address and click the green “+” button.
You can attach documents to your email in the Attachments row. To do this, click Browse, select the file from your directory and click Add.
In the Sending Options row you can choose the following options:
| Sending Option | Description |
|---|---|
| Disable Automatic Reply Email | Activate this option if, for example, you do not want to receive out-of-office notifications. |
| Send a Copy Of the Message To | Sender: You will receive a copy of the email you sent. Reply to: The alternative reply address you entered above will receive a copy of the email you sent. If no alternative reply address is provided, this option is not available. If one is provided, both selection options can be activated. |
| Send Confirmation About Receipt | Sender: This option is activated by default. After your message has been sent, you will receive a send confirmation. Reply to: The alternative reply address you entered above will receive a send confirmation of the email you sent. If no alternative reply address is provided, this option is not available. If one is provided, both selection options can be activated. |
| Send Contents Of Message As | Plain Text: This option is selected by default and is recommended. HTML Text: You can also send your email in HTML format. However, this should normally be unnecessary. |
4. When you have finished your email, click the Send button to send it.
Email to Individual Participants on the Confirmed Place List
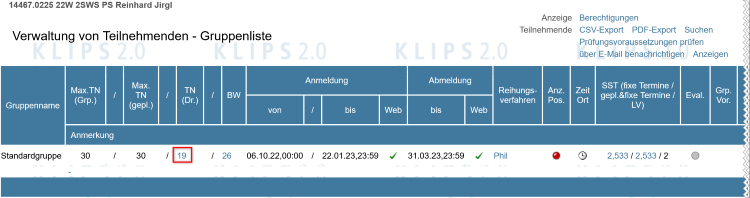
1. If you would like to write to individual students on your course’s list of participants (confirmed places), click on the number of participants of the desired group in the Curr. Part.(Dr.) column of the table (usually the Standard Group).
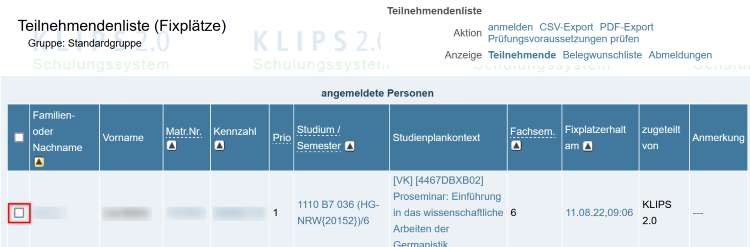
2. The List of Participants (Confirmed Places) window opens. Activate the Check Boxes in front of the students you want to contact.
3. The navigation menu Marked Lists of Participants appears in a green box in the upper right area. Click on the Email link in the Operations For All Marked Students row.

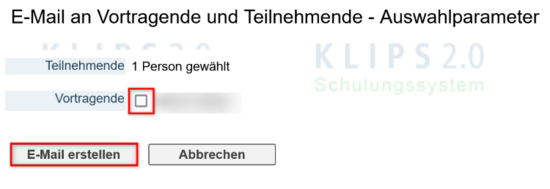
4. The Email to Lecturers and Participants - Selection Parameters window opens.
The number of selected participants who are to receive your email is displayed in the Participants row.
The other lecturers in your course, if available, are displayed in the Lecturers row. Activate the appropriate Check Boxes if you want other lecturers to also receive the email.
5. Click the Write Email button.
6. The “Send Email” window opens. Create your message as described above in the “Email to All Students (Confirmed Place List, Course Place Request List or Both)” chapter.
Email to Individual Students on the Course Place Request List
1. If you would like to write to individual students on your course's course place request list, click on the number of participants of the desired group in the PR column of the table (usually the Standard Group).
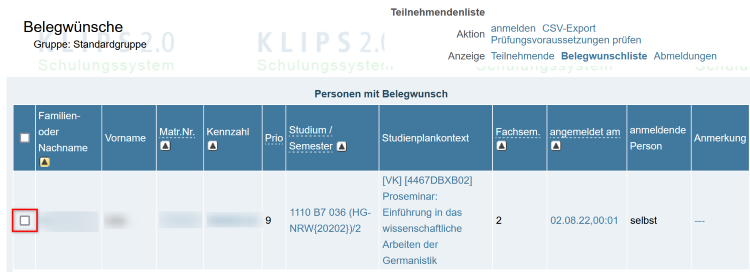
2. The “Course Place Requests” window opens. Activate the Check Boxes in front of the students you want to contact.
3. The navigation menu Marked Lists of Participants appears in a green box in the upper right area. Click on the Email link in the Operations For All Marked Students row.

4. The Email to Lecturers and Participants - Selection Parameters window opens.
The number of selected participants who are to receive your email is displayed in the Participants row.
The other lecturers in your course, if available, are displayed in the Lecturers row. Activate the appropriate Check Boxes if you want other lecturers to also receive the email.
5. Click the Write Email button.
6. The “Send Email” window opens. Create your message as described above in the “Email to All Students (Confirmed Place List, Course Place Request List or Both)” chapter.