List of Participants (Confirmed Places)
Contents of this Chapter
- Opening List of Participants
- Exporting List of Participants
- Printing List of Participants
- Editing List of Participants
- Basic Procedure for Editing a List of Participants
- Displaying Prioritisation of Students in the List of Participants
- Transferring Participants from the Course Place Request List/Waiting List to the Confirmed Place List
- Transferring Participants from the Confirmed Place List to the Course Place Request List
- Deregistering Participants
- Further Functions of the List of Participants
- Registering Students
Opening List of Participants
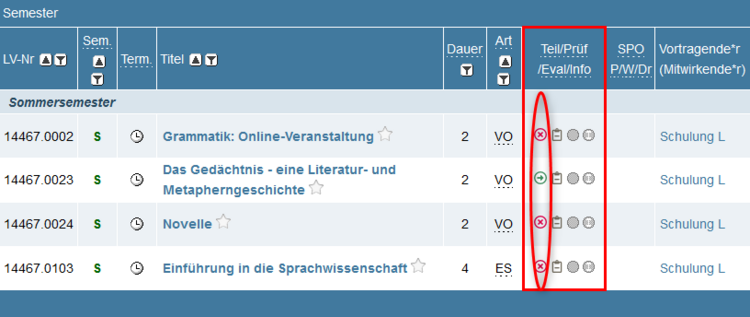
1. You are on your Personal Business Card. In the Application Menu, click on the Courses application. Your own Courses Offered will be displayed.
2. In the row of the course whose list of participants you would like to view, click on the Red Cross icon or Green Arrow icon in the Part/Exams/Eval/Info column.
3. The Participants Administration - Group List window opens. The number of participants on the list of participants (list of confirmed places) is displayed in the Curr. Part.(Dr.) column. Click on the displayed value to open the list of participants.
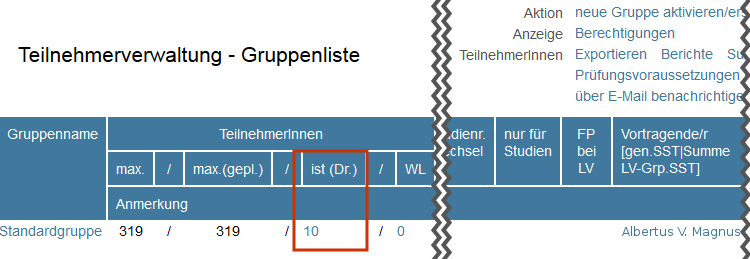
Please note: In KLIPS 2.0, courses are generally divided into course groups. In the simplest case, a course contains exactly one course group, the "standard group" (“Standardgruppe”).
If doctoral students have also registered for the course, their number will also be stated in brackets in the column “Curr. Part.(Dr.)”.
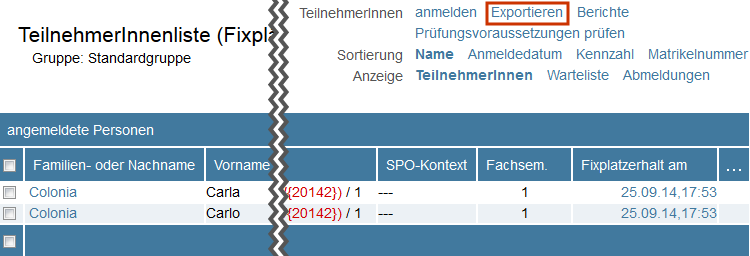
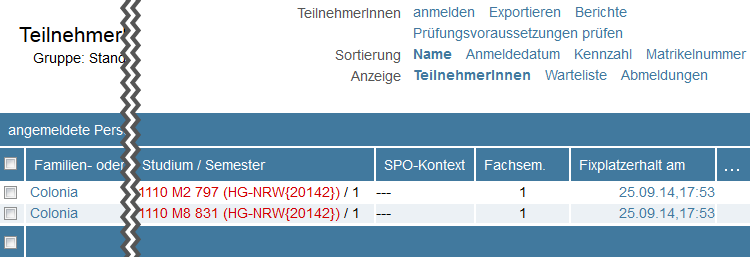
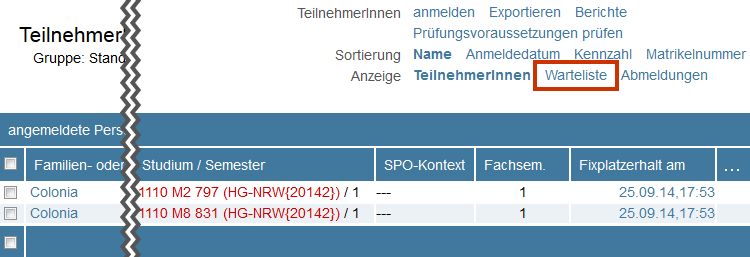
4. The “List of Participants (Confirmed Places)” window opens. A tabular overview shows you all participants in the selected course group who have received a place in your course.
Exporting List of Participants
1. You have opened the List of Participants (Confirmed Places). In the Operation row in the List of Participants navigation area at the top right, click CSV-Export.
2. The Export List of Participants - Selection Parameters window opens.
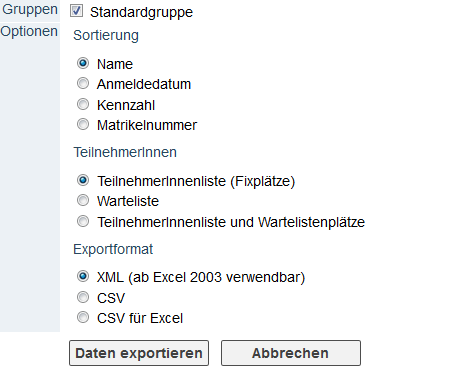
3. If your course is divided into several course groups, activate the desired course groups using the Checkboxes. Otherwise the Standard Group („Standardgruppe“) is activated.
4. Set the following options:
- Output Option
- Participants
- Export Format
Please note: If you want to edit the list of participants in Excel, select either the export format " XML (to be used with Excel 2003 and newer versions)" or "CSV for Excel". We recommend exporting to XML.
5. Click the Export Data button.
6. The File Download window appears.
Please note: If the "File Download" window does not appear, it may be because your browser settings prevent pop-ups from opening. Depending on which browser you use, you can find help on the following websites: Firefox, Chrome, Internet Explorer.
7. Click the Download XML Document (“XML Dokument downloaden”) link.
8. The Windows Open from... dialog box opens. Depending on the browser you use, you have the option of opening the file directly or saving it locally. We recommend that you save the file locally and then edit it in Excel.
9. The exported file (*.xml or *.csv) can be opened directly in Excel. It is advisable to save the opened file in the usual Excel format (*.xlsx) before editing it further.
Please note: If you would like to pass around the list of participants in your course to check attendance, please make sure to only include the name of the participant and a corresponding column for the signature. Do not give out matriculation numbers and/or email addresses in conjunction with names!
Printing List of Participants
In addition to printing an exported list of participants, KLIPS 2.0 also offers you the option of creating a list of participants as a PDF file.
1. You are on your Personal Business Card. In the Application Menu, click on the Courses application. Your own Course Offered will be displayed.
2. In the navigation area, click List of Participants in the Display row. The List of Participants - Select Lecturer window opens.
3. First select the Semester (summer or winter semester) in the navigation area at the top right.
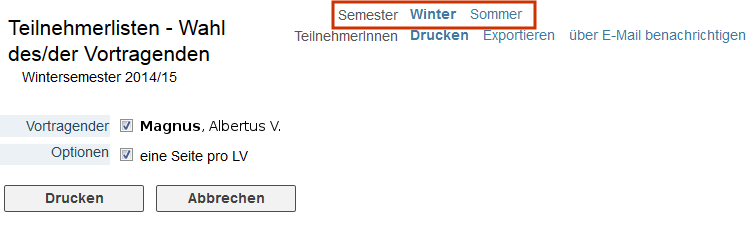
4. If other Lecturers are also assigned to your courses, you have the option of selecting them using the corresponding checkboxes.
5. The option One Page Per Course creates a page break after each list of participants in a course.
6. Click the Print button.
7. The Open from... dialog box opens. You have the option to open the PDF file directly or save it locally. Then print the PDF file using Adobe Acrobat Reader.
Editing List of Participants
Basic Procedure for Editing a List of Participants
1. Based on the List of Participants (Confirmed Places), you have various other options for managing registered participants in a course group.
2. To do this, activate the Check Boxes to the left of the participants' names to select them for editing. As soon as you have made a selection, the Navigation Area at the top right (outlined in green) changes and shows you all the available operations.
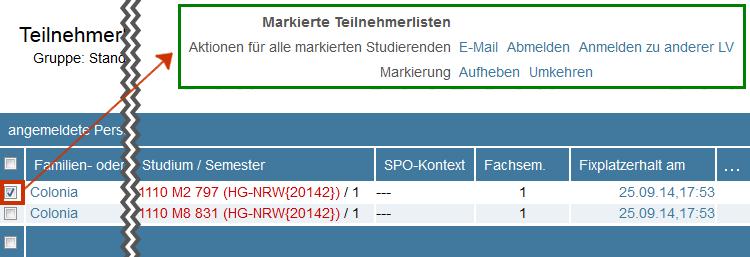
3. Click on the desired link in the row Operations for All Marked Students in the navigation area outlined in green at the top right.
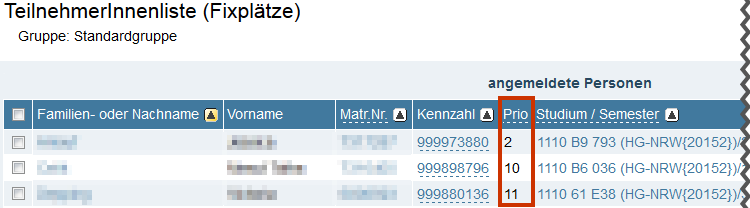
Displaying Prioritisation of Students in the List of Participants
To make editing easier for you, the list of participants (confirmed place list) shows you the prioritisation with which students have submitted place requests for a course.
Transferring Participants from the Course Place Request List/Waiting List to the Confirmed Place List
1. You opened the List of Participants (Confirmed Places).
2. In the Display row in the navigation area at the top right, click on Place Request List to switch from the Confirmed Place to the Course Place Request List.
3. Activate the Check Boxes to the left of the names of the participants you want to move from the course place request/waiting list to the confirmed place list. The navigation area at the top right changes.
4. Click on the Assign Available Place link in the row Operations for All Marked Students in the navigation area outlined in green at the top right.
5. The Assign Confirmed Places window opens. The option Selected Persons Will Be Notified by Email is activated by default, thus, participants will be notified about this action by email. Optionally, you can add additional comments to the text of the email using the text field.
6. Click on the Assign Available Place button. The affected participants will be placed on the confirmed place list. The Assign Confirmed Places window closes.
7. When you return to the Course Place Request List window, you will find the list updated. To view the list of confirmed places, click on Participants in the Display row of the navigation area at the top right.
Transferring Participants from the Confirmed Place List to the Course Place Request List
Please note: Transferring to the course place request list is only possible for courses with the ranking system “Seq.UoC” (“Anmeldezeitpunkt UzK”).
1. You opened the List of Participants (Confirmed Places). Activate the Check Boxes to the left of the names of the participants you want to transfer from the “confirmed place” to the “course place request" list. The Navigation Area at the top right changes.
2. Click on the Place on Waiting List link in the row Operations for All Marked Students in the navigation area outlined in green at the top right.
3. The Place Participants Back on the Waiting List window opens. The option Selected Persons Will Be Notified By Email is activated by default, thus, the participants will be notified about this action by email. Optionally, you can add additional comments to the text of the email using the text field.
4. Click the Place on Waiting List button. The affected participants will be placed on the waiting list and the Place Participants Back on the Waiting List window will close.
5. When you return to the List of Participants (Confirmed Places) window, you will find the list updated. To view the waiting list, click on Waiting List in the Display row of the navigation area at the top right.
Deregistering Participants
1. You opened the List of Participants (Confirmed Places). Activate the Check Boxes to the left of the names of the participants you want to deregister from your course. The Navigation Area at the top right changes.
2. Click on the Deregister link in the row Operations for All Marked Students in the navigation area outlined in green at the top right.
3. The Deregister Students window opens. The option Selected Persons Will Be Notified By Email is activated by default, thus, the participants will be notified about this action by email. Optionally, you can add additional comments to the text of the email using the text field.
4. Click the Deregister button. The participants will be deregistered from the course and the Deregister Students window closes.
5. When you return to the List of Participants (Confirmed Places) window, you will find the list updated. To view the deregistered students, click on Deregistrations in the Display row of the navigation area at the top right.
Further Functions of the List of Participants
| Function | Description |
|---|---|
| Create Individual Groups | Registers a participant for individual lessons (individual group). |
| Group Re-Registration | Registers participants from the waiting list to the list of participants (also, for example, participants from the waiting list of your group to the participant list of another group, if you are authorised to do so). |
| Reg. for Other Course | Registers participants for other courses. You must be authorised for participant administration for the respective course. |
| Notes | Create a note for several participants. |
Registering Students
1. You opened in the “List of Participants (Confirmed Places)”. Click on “Register” in the “Operation” row at the top right of the Navigation Area.

2. The Search for Persons window opens. Enter either the name, part of the name or the student’s matriculation number and click Search.
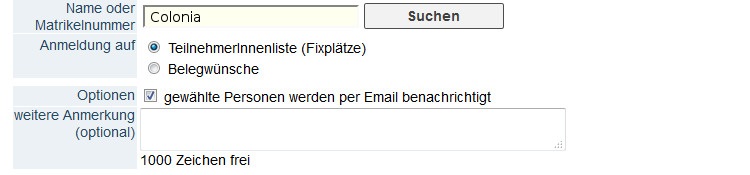
3. Use the Registration for option to select whether the student should be registered directly on the List of Participants (Confirmed Places) or whether a course place request for the Waiting List”should be submitted. Students registered to the Waiting List will be entered into the given allocation process of the course.
4. The option Selected Persons Will Be Notified By Email is activated by default, thus, the participants will be notified about this action by email. Optionally, you can add additional comments to the text of the email using the text field.
5. You will be offered a Register button for each of the student's subjects or degree programmes. Click on the Register button for the correct subject or degree programme.
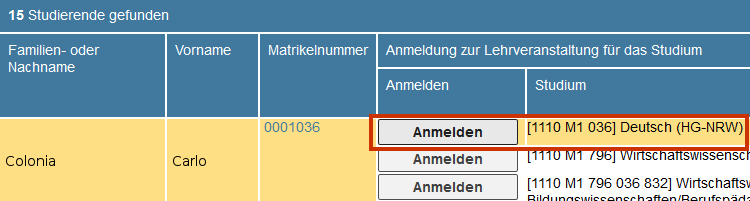
Please note: Make sure you choose the correct subject or degree programme. Otherwise, the SPO context cannot be allocated.
6. A notification appears stating that the student has been registered. Click OK. The SPO context is allocated next.
7. The “Adjust SPO Context” window appears. Use the Radio Button in the structure tree to select the desired SPO context.
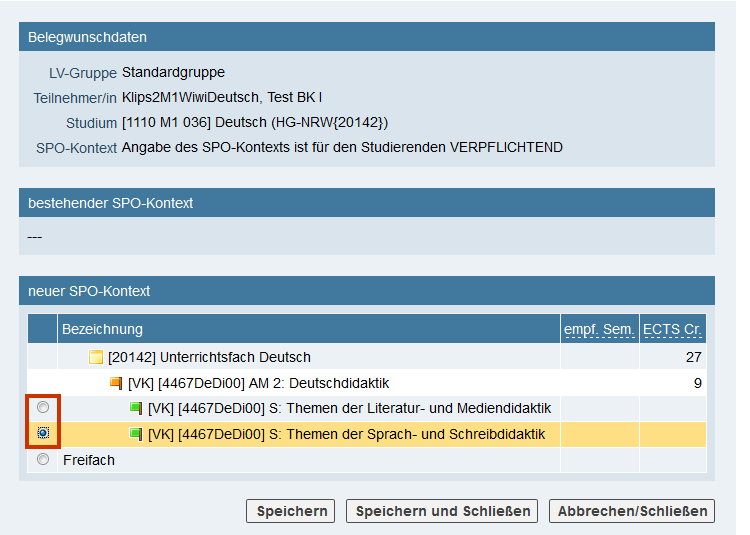
8. Click the Save and Close button. You will return to the Search for Persons window. If you do not want to register any other persons, close the window.
9. When you return to the List of Participants (Confirmed Places) window, the list will be updated.