Printing Timetables
Contents of this Chapter
Printing Timetables of Your Own Course(s)
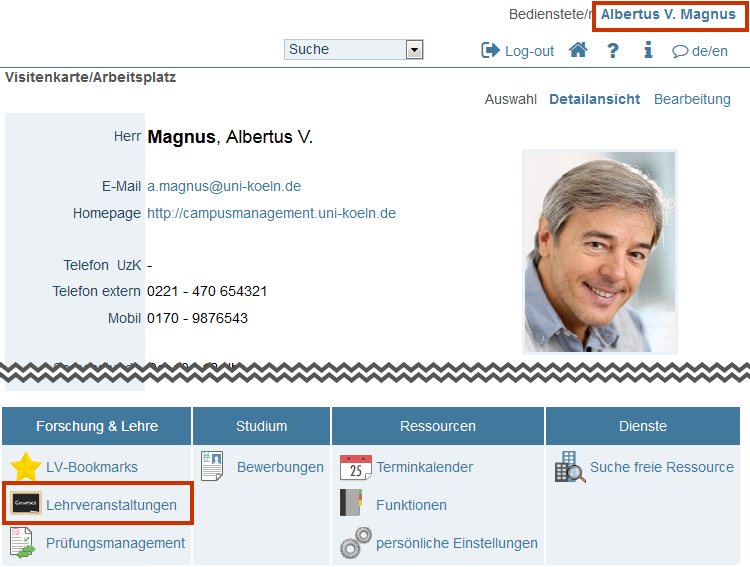
1. Click on your name in the top right to open your Personal Business Card.
2. Click on the Courses application in the Application Menu.
3. Your Courses Offered (courses for which you are listed as a lecturer or assistant in KLIPS 2.0) will be displayed.
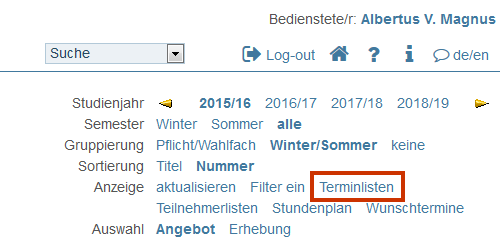
4. In the navigation area, click Timetables in the Display row.
5. The Course Lists - Printing Options/ Timetable window opens. All courses for the selected academic year are displayed in a tabular overview. Scroll down to specify the printing options for your timetable (see the Printing Options (Explanations) table below for more information with examples).
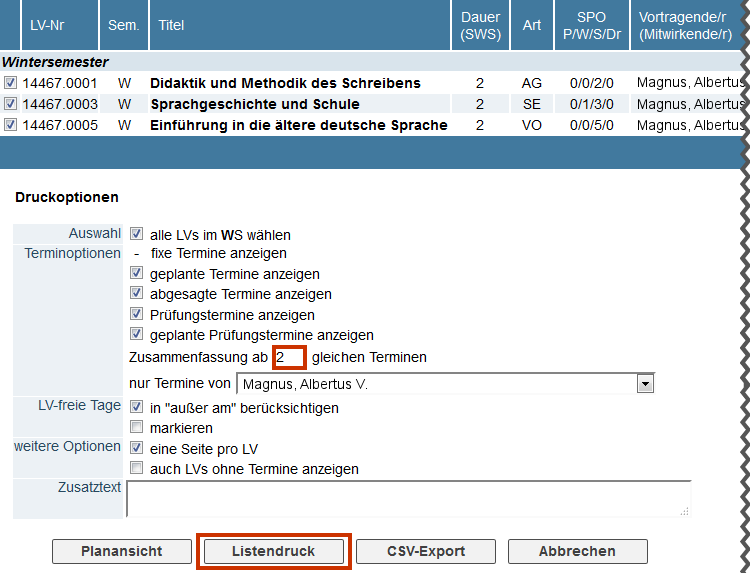
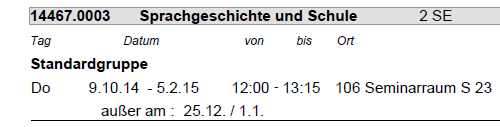
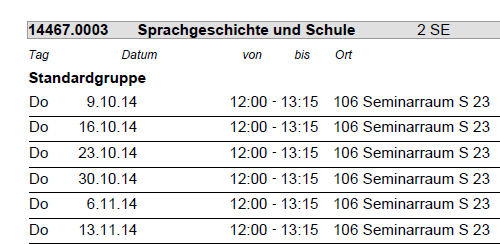
6. If you would like the same dates of a course to be grouped together in your timetable list, enter a value "n > 1" in the Summarise If <n> Or More Same Dates text field (further information with an example can be found in the table Print Options (Explanations) below).
7. Use the Only Dates of selection field to select your name (if other lecturers are assigned to your courses).
8. Click the Print List button. Your timetable will open as a PDF file.
Please note: For more information about printing options, see "Printing Options (Explanations)" below.
Printing Options (Explanations)
| Option | Explanation |
|---|---|
| Selection | Use the checkboxes to select whether you want to show all courses in the winter semester or summer semester. |
| Date Options |
|
| Days Without Classes |
|
| Further Options |
|
| Additional Text | The text entered here will be displayed at the end of the file. Number of characters allowed: 2000. |